I haven’t worked with Blender since version 2.71 way back in the day. My wife asked me to help her weight paint some hair she was creating; I didn’t really know what I was doing, but we fumbled through it together.
Today, I wanted to run some tests on mesh animation and deformation to understand how it’s accomplished. To animate a mesh, you need to parent it to an Armature, which can then be posed however you see fit.
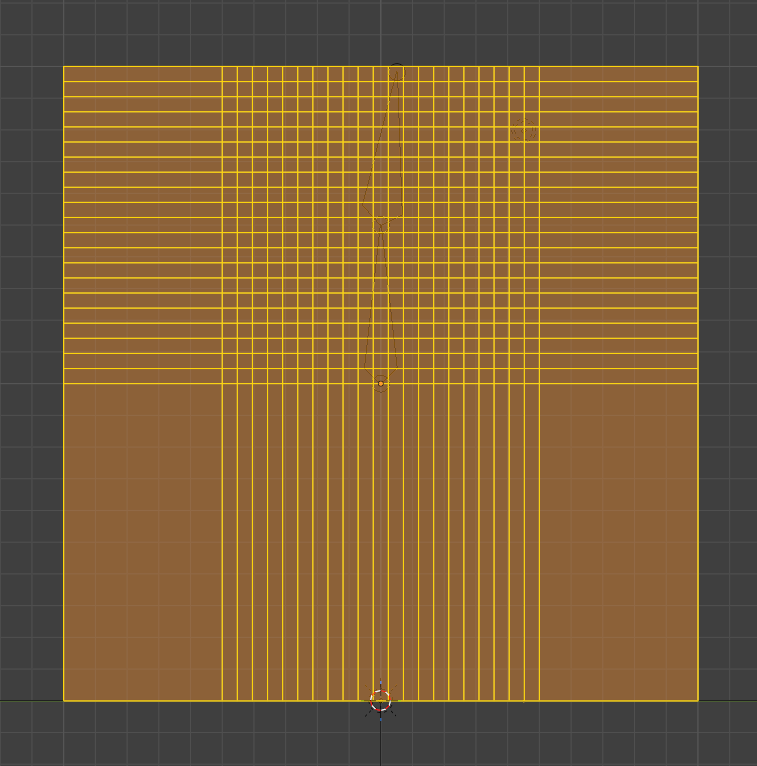
Here you can see how I added “resolution” to the deformation area using loop cuts. I started with four vertical loop cuts and one horizontal cut in the center. After that, you have regions that can be cut even further. The loop cuts happen inside your previous loop cuts. Then, I added ten more horizontal and ten more vertical cuts. This might be overkill for games, but it looks good to me!
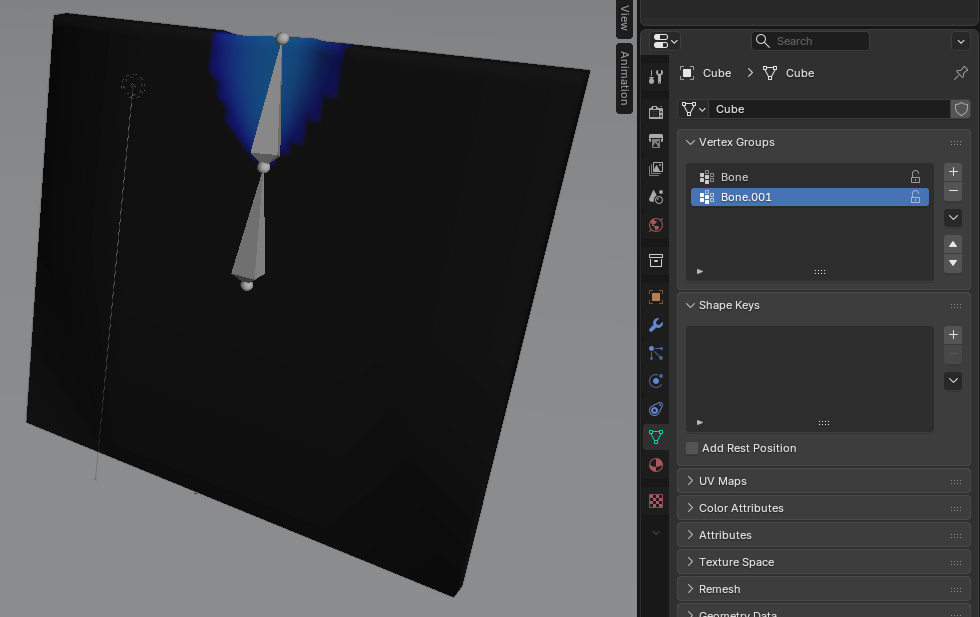
Next, I created the armature, starting with a root bone at the center and adding a second bone above it to bend the top edge. I parented the mesh to the armature using Automatic Weights.
In Weight Paint mode, I saw that the weights were assigned correctly but needed tuning. Because I only used two bones, Blender decided the top bone should affect the entire mesh. While the gradient looked good, the boundaries needed tweaking. By selecting Weights > Levels, I played with the Offset and Gain. If you have already posed your bones, you can see the weight map adjustments update the mesh in real-time. It’s a really neat workflow.
I just wanted a simple bend at the top of a fence. The key is following the right order:
- Start with a new Blender file and delete the default objects.
- Add a mesh (Cube or Cylinder).
- Enter Edit Mode and add loop cuts or subdivide. Put the resolution exactly where you need the mesh to bend. No need to waste it were you don’t.
- Apply All Transforms (Scaling/Rotation). If you don’t, automatic weights will not calculate correctly.
- Add an Armature; you will be presented with a single root bone.
- Move the bone to the center of your object.
- In Edit Mode, select the “tail” of the root bone and Extrude (E) to create a second bone.
- Place the new bone’s tail where you want the deformation to end (for me, the edge of the fence).
- In Object Mode, select the mesh first, then Shift+Select the armature.
- Parent the mesh to the armature (Ctrl+P) and choose With Automatic Weights.
- Select the armature, switch to Pose Mode, and select the bone you want to animate.
- Rotate the bone to see how the automatic weights behave.
- To fine-tune, switch back to Object Mode, select the mesh, and then enter Weight Paint Mode.
- Open the Object Data Properties tab (the green triangle icon) to see your Vertex Groups.
- Select the vertex group for the bone you want to adjust (e.g., “Bone.001”).
- To refine the influence, go to the Weights menu and select Levels.
- Adjust the Offset and Gain to your liking.
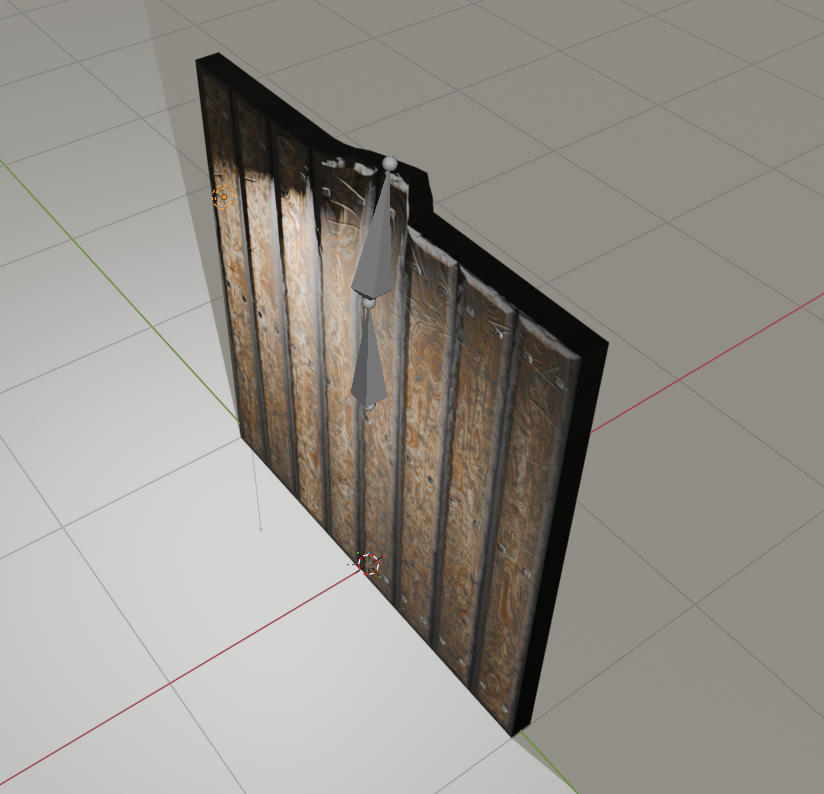
I was finally able to localize the deformation to a small area, just as I intended. I ran into several hurdles and had to restart the file a dozen times before I nailed the workflow. Don’t be discouraged if this happens to you! It took me 17 steps in a specific order to get this working, but in the end, I got my bent fence. I hope you find the rhythm faster than I did!